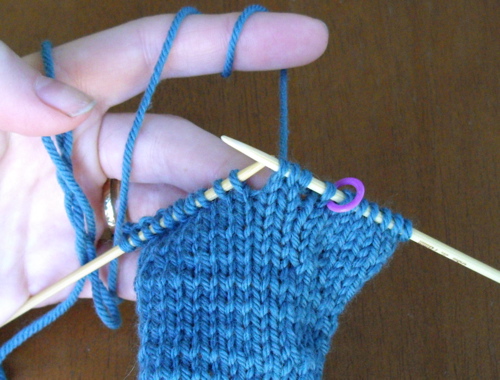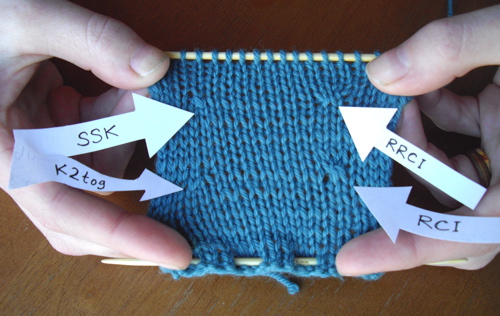
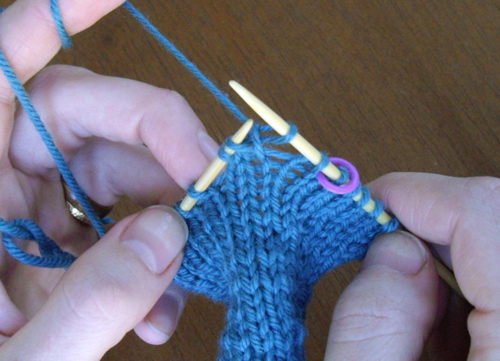
Here we show two increase stitches (RCI and RRCI) and the
matching decrease stitches (k2tog and ssk) in a swatch.
by sarah-marie belcastro and Rachel Shorey
The Backstory: If it has ever bothered you that there is no increase that truly looks like an upside-down k2tog decrease, you’ll understand why sarah-marie was frustrated. She is a mathematician, and she wanted to be able to knit items with symmetric-looking increases and decreases. One day, as she glumly proceeded through the foot of a sock, she grumbled to Rachel that even if she could design a heel with locally uniform curvature, it wouldn’t be worth knitting because it would have bumps at the increases and it would look terrible. Rachel put down her knitting and picked up some scrap yarn. About five minutes later, she showed sarah-marie an increase that looked like two knit stitches flowing out of one knit stitch on the previous row. Rachel’s Cool Increase (RCI) was born.

Here we show two increase stitches (RCI and RRCI) and the
matching decrease stitches (k2tog and ssk) in a swatch.
Later that week, sarah-marie searched through every book in her library and a few internet sources and concluded that this was an actually new increase that Rachel had devised. She felt that it should be shared with the world, and this webpage is the result.
What it's good for: Use the RCI when you need an upside-down
version of that old workhorse, the k2tog decrease. Its companion, the
Reversed Rachel's Cool Increase (RRCI), looks like an upended ssk
decrease. The RCI and the RRCI are perfect for designs
requiring increase-decrease symmetry, such as the heel of a sock. They are
helpful in reversing the direction of knitting in a pattern---if, say a sweater
pattern is written to be knitted from the hem to the shoulders, and you'd prefer
to knit from the top down, simply replace each k2tog with an RCI and each ssk
with a RRCI. Or use this technique to convert top-down sock patterns
to be toe-up, and vice-versa. Use the RCI if you are troubled by little holes
left in your work by doing m1
increases, or replace any increase in a pattern with the
RCI or RRCI! We were inspired to create a sock that combines Judy’s
Magic Cast-On and Jeny’s
Surprisingly Stretchy Bind-Off with RCI
and RRCI---the RCI is used both structurally (for a mathematical heel by sarah-marie)
and decoratively (in a motif designed by Rachel). The pattern is available
on ravelry.
How to do it: These instructions are written for standard western-style right-handed knitting. For simplicity, we have not included instructions for other styles or handednesses, and hope that knitters can translate our instructions for their own styles. Many left-handed knitters can simply swap the words "left" and "right" in the instructions below (well, at least this works for sarah-marie).
1. Knit 2 stitches.
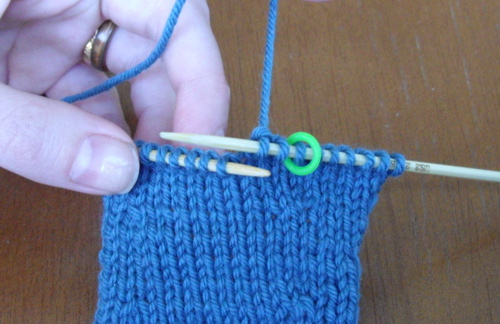
2. Slip one stitch back to left-hand needle.
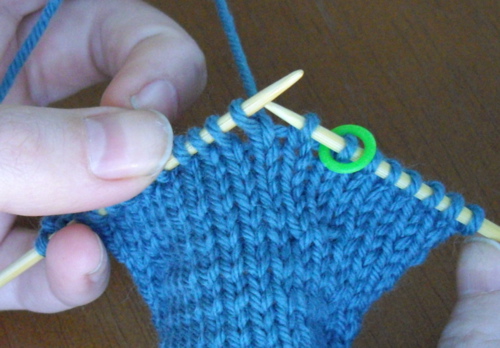
3. Pick up the leg under the first stitch on the right-hand needle, and knit into it. Tip: after picking up the leg and inserting the right-hand needle into that loop, snug up the yarn to avoid a loose slipped stitch in step 4 (below).
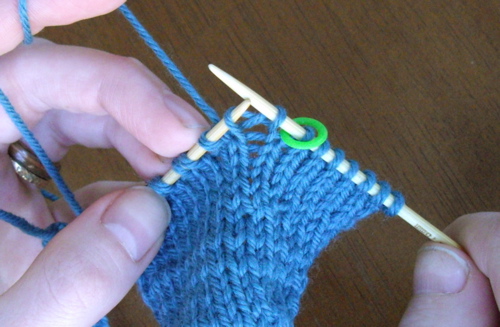
Picking
up the leg
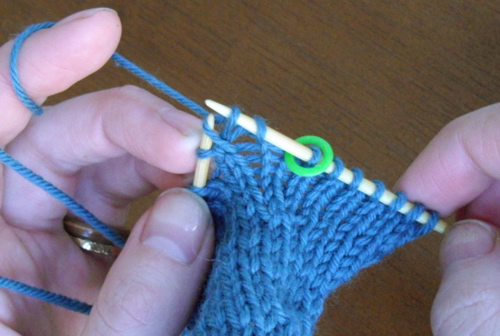
Knitting
into the leg
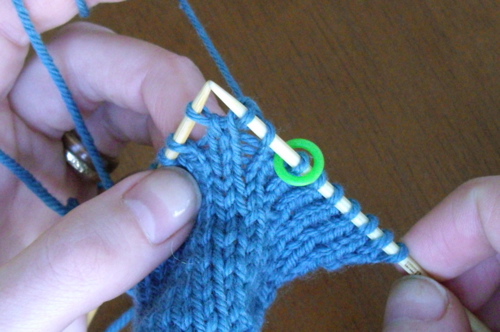
step
3 completed
4. Slip one.
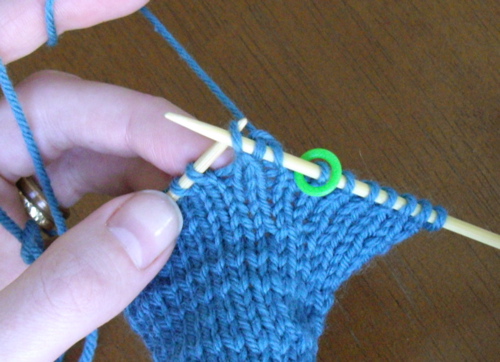
1. Knit 3 stitches.
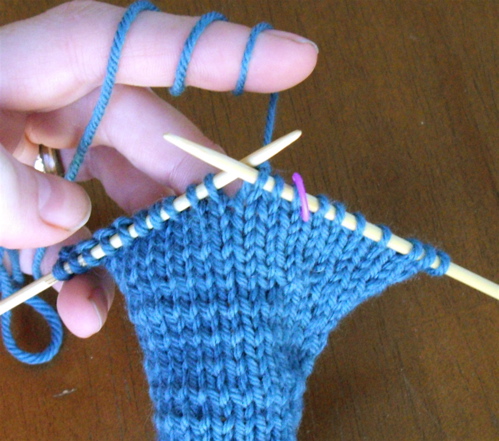
2. Slip 2 stitches back to left-hand needle.
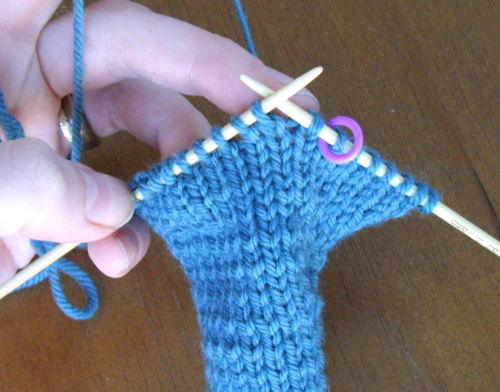 <
< 3. Pick up leg under the first stitch on the left-hand needle and knit into it. Tip: after picking up the leg and inserting the right-hand needle into that loop, snug up the yarn to avoid a loose slipped stitch in step 4 (below).
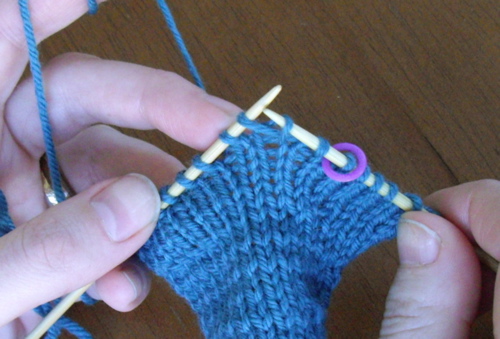
Picking up the leg
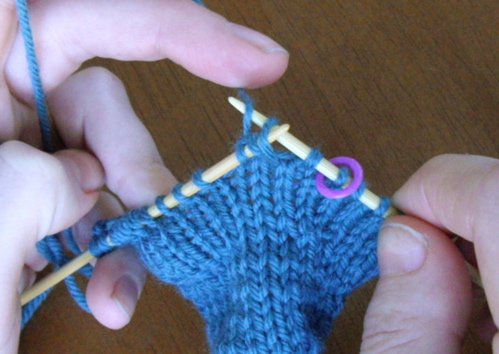
Knitting into the leg
step 3 completed
4. Slip 2.
